Canalblog
Suivre ce blog Administration + Créer mon blog

photoshop tutorials tips

14 août 2010

create a photo Frame with a label

photoshop tutorials  buy cheap adobe photoshop cs5


souce http://www.aircavs.com/index.php?option=com_content&view=article&id=188:create-a-photo-frame-with-a-label&catid=34:tip


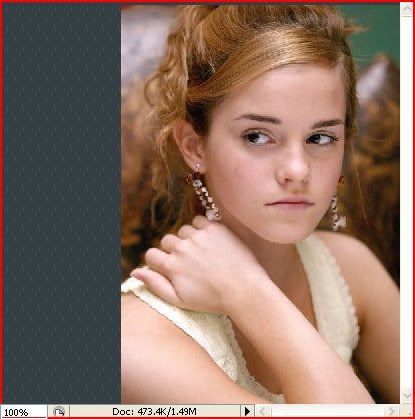
do you have some photo that you want make it a photoshop fram 
,besides that,you want create a label for each photo? i find the picture
of emma ,and create a notepad style photo fram,and give it a lable my
girl.hope one day it become true!!!!ok let `s star ,tell you how make
it my girl !!


!


step 1 opan a new document


create a new file 400*404 pixels with the default resolution (DPI) of 72


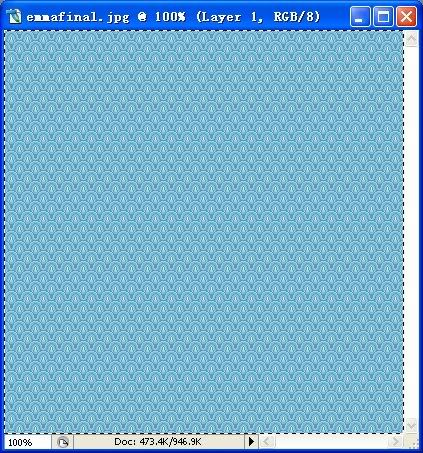
before that i tell you how to make you own background .i use this  picture as pattern.


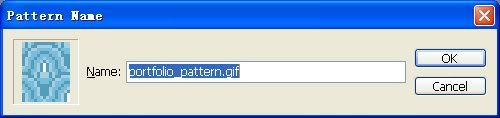
Open up the file and apply Edit > Define Pattern to save this
picture as pattern, after that go back to our main document and use
Paint Bucket Tool (just use Pattern mode instead of Foreground).


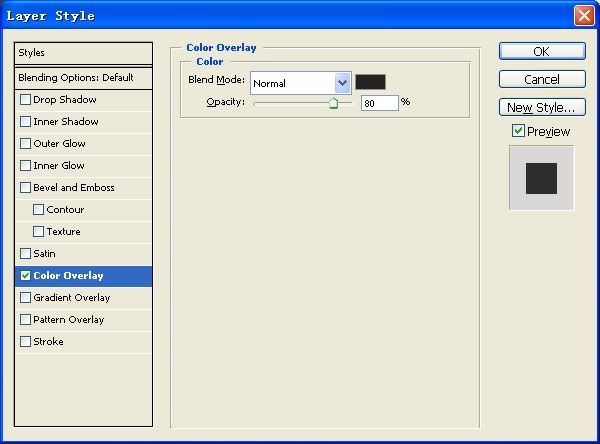
for make the color a little dark,i Apply
Color Overlay layer style to the background layer.set the color #242121
,and opacity 80%


next i copy emma `s picture to this new file


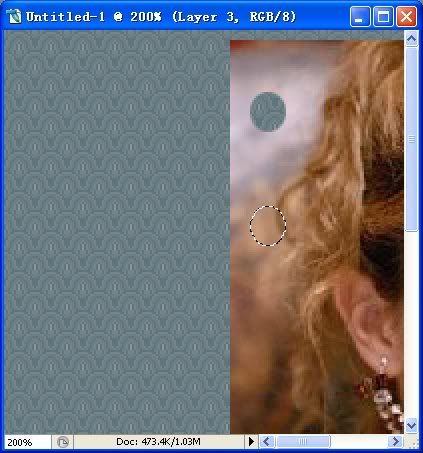
step 2 give it a notepad style


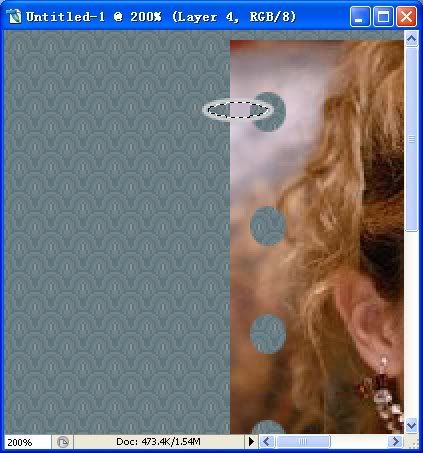
select the Elliptical Marquee Tool make
round selection  and press Delete to clear selected area.and press down
Arrow button  move selected area  down and press Delete again. Do the
same things until at the bottom of the picture . it will be like this


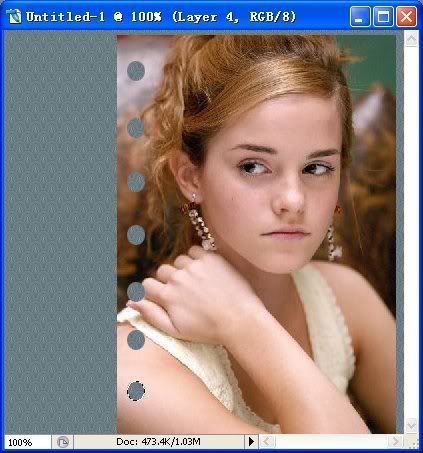
step 3 give my beaty ring.


i do not mean the magic ring or Diamond ring that i do not have .just give my beaty a ring in photoshop. i show you how.


Press M to get your Elliptical Marquee tool back, and create a circular shape like mine below.


Now fill your selection with the colour CCCCCC.


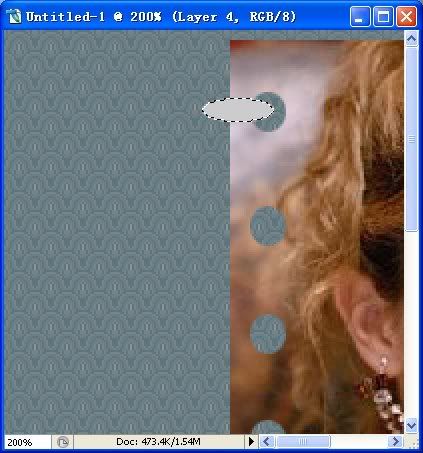
go to Select > Modify > Contract, and
contract your selection by three pixels before pressing Backspace on
your keyboard to clear it.


Finally, select the area hidden by the
cover, by pressing L on your keyboard to get your Polygonal Lasso tool
back, and clear it.


Now just repeat this step for the ring at the bottom


look at the pictue,i give 7 rings to my beauty.haha


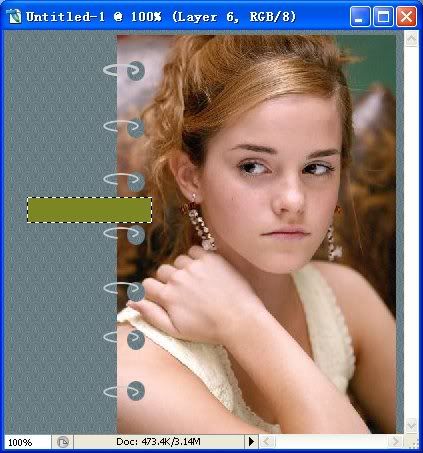
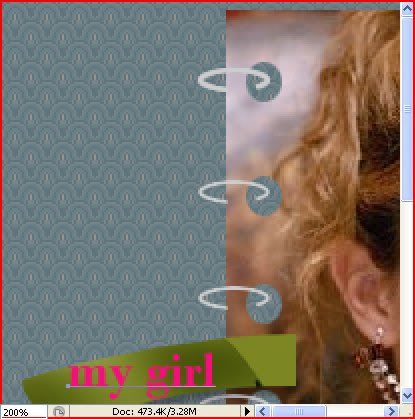
step 4 give it a label


to mark it is my girl ,i want past a lable next to it.


using Rectangular Marquee Tool. Fill selected area with color of #7c8623.


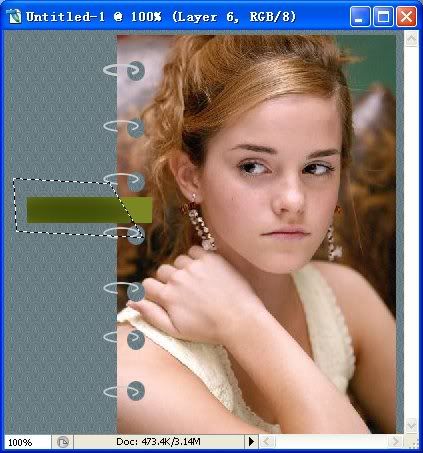
Then select the Polygonal Lasso Tool to create another one selection as was shown on my picture bellow.


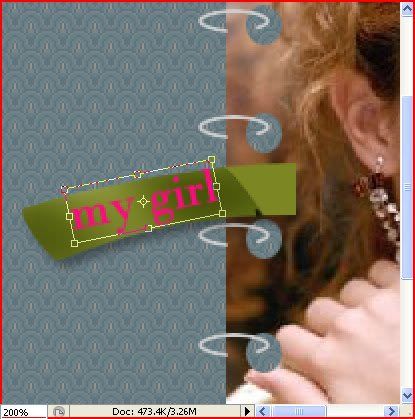
Then use the Burn Tool (Brush: 45 px, Range: Midtones, Exposure: 30%) to add a dark spots to the selected label area.next use the Dodge Tool (Brush: 45 px, Range: Midtones, Exposure: 30%) to bring this label volume form


now apply Edit > Transform > Warp to transform it a little bit.


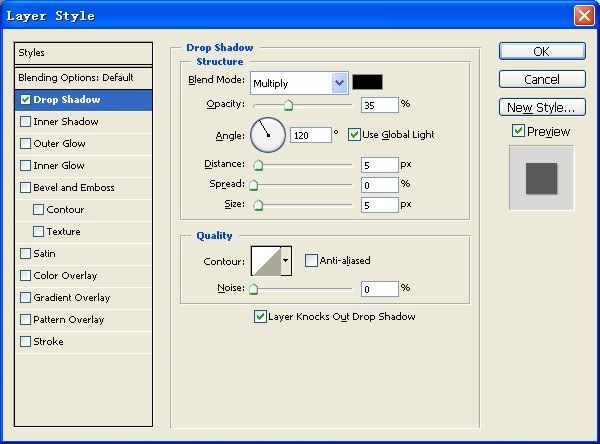
now time to add the shadow to the label. Apply Drop Shadow layer style to current layer style:


step 5  add your word .


write my girl ,and then using Ctrl+t to  rotate the text a little


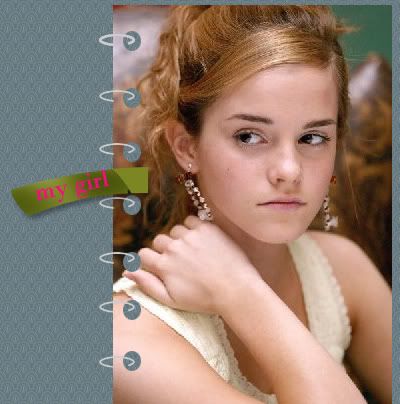
at last ,see the final effect picture ,my girl .


Publicité
Publicité
18 juin 2010

Photochrom Vintage Postcard

photoshop tutorials tips

www.aircavs.com

Turn your travel photos into vintage postcards. This effect is based   on old photochrom photos, like the one shown in the About    Photochroms section of this lesson. This technique works best on    colorful photos that have good contrast and lots of detail, especially  architectural detail. For best results:

  • If necessary, adjust the color tone and contrast of your photo  before  you begin.
  • If you have dull, washed-out skies, colorize the sky to add some  blue before you begin.
Before After
Paris before Paris
  after
    

To create a vintage postcard:

  1. Open the image you want to use for the postcard.
  2. Duplicate the image on a new layer and apply a blending mode to  the  duplicate image:
    1. Press Ctrl+J to duplicate the image  on a new layer above the background layer.
    2. In the Layers Palette, select the Color Dodge blend  mode.
    3. At the top right of the Layers palette, reduce the layer Opacity  to 65%. The image should look similar to the following:
      Color
 Dodge effect
  3. Add a Photo Filter adjustment layer above the duplicate layer:
    1. In the Layers Palette, click the New Adjustment layer   icon and select Photo Filter.
    2. In the Photo Filter window, select the Sepia filter from the   drop-down list.
    3. Uncheck Preserve Luminosity.
    4. Reduce the Density to 50%.
    5. Click OK.
  4. On the Photo Filter adjustment layer, add a blending mode and  adjust  opacity:
    1. Select the Multiply blending mode.
    2. At the top right of the Layers palette, reduce the layer Opacity  to 50%
  5. On the same Photo Filter adjustment layer, add a Photographic    Effects layer style:
    1. From the Windows menu, select Effects to open  the  Effects palette.
    2. In the Effects palette, click the Layer Styles  icon, then select Photographic Effects from the   drop-down list.
    3. Select the Orange Gradient effect.
    4. Click Apply.
    Sepia
  layer settings
  6. Create a new Brightness/Contrast adjustment layer   above the Photo Filter layer. In the Brightness/Contrast window, adjust   the contrast to +20 and click OK. Do not change any   other settings.
  7. Create a new Hue/Saturation adjustment layer above   the Photo Filter layer. In the Hue/Saturation window, adjust the   saturation to +20 and click OK. Do not change any other   settings.

Your Layers palette should look something like this when completed:
Layers palette

About Photochroms

According to the American Photochrom Archive Gallery:

"A Photochrom is a color photo lithograph, produced from a   black-and-white negative. The final prints were created using different   color impressions from multiple lithographic stones."

This photographic technique became very popular in the 1890's,   especially when the Post Office introduced the penny postcard.
The inspiration for this effect is shown below:

Paris 
 photochrom Photochrom photo from the Library   of Congress where you can find many public domain images and images   you can use for personal projects. Search for "photochrom Eiffel."

Example

Here is another example of this effect applied to a contemporary   Paris photo:

   
Before After
Paris Mouche before Paris Mouche after
Publicité
Publicité
photoshop tutorials tips
Publicité
Publicité